UPDATING THE MKII AI CONTROLLER FIRMWARE (PC ONLY)
1. Download the appropriate firmware for the new style controller. This can be found at the D-D website towards the bottom of the page at the link below.Click on the image of the MKII controller and this will take you to the AI support page to download the firmware. At the support page right click on the firmware bin file and select Save/Save as command.
http://www.theaquariumsolution.com/ai-led-controller-mk-ii
WARNING!! DO NOT DOWNLOAD THE FIRMWARE FOR THE ORIGINAL MKI CONTROLLER AS THIS WILL CRASH YOUR NEW STYLE CONTROLLER AND RENDER IT UNUSABLE!!!
2. Disconnect your controller from your mains adapter or wired SOL connection and plug the supplied USB cable into your PC
3. Once connected to your PC wait for the controller to boot normally and enter the menu and select firmware update
4. The controller will then list the current firmware version and a warning that the USB must be connected to a Windows PC. Click O.K
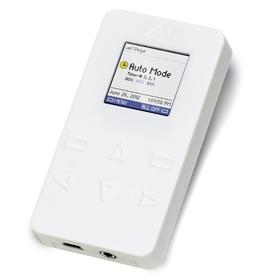
5. The controller will then reboot into Firmware upgrade mode as shown on the display
6. Now the controller is in upgrade mode it will show in Windows as a small removable storage drive and Windows will automatically ask if you would like to view the files on the drive. The controller can also be found manually by selecting ‘Start’ and navigating to ‘Computer’. The Controller will show in the list of storage devices attached to your computer and will be named ‘AQUA_ILLUMN’
7. Right click on the device named ‘AQUA_ILLUMN’ if you searched for it manually and select open. If Windows automatically asked you if you would like to view the files of the connected drive you will already be viewing the root directory of the controller. There will be a folder inside named ‘firmware.bin’
8. Locate the firmware file previously downloaded; it will be listed as ‘new-controller_x.x.x.bin’. The x symbols will be replaced by numbers depending on firmware version downloaded. Example : new-controller_1.3.1.bin
9. Right click on the downloaded file and click copy
10. Go back to the controller and right click and delete the file ‘fimware.bin’, then right click again and select paste. This will paste the downloaded file into the controller’s storage.
11. The only file showing on the ‘AQUA_ILLUMM’ drive will now be the downloaded firmware file. You can now remove the controller by right clicking on the drive named ‘AQUA_ILLUMIN’ and selecting eject and removing the USB cable from the PC.
12. Plug the controller back into the power supply or attach directly to your SOL lights if using wired mode.
13. If using wirelessly with your Vega ot Hydra the controller will now automatically update the lights firmware before returning to normal operation.
In some instances a major firmware update may reset the controller’s user settings so it is a good idea to keep a record of all settings before carrying out a firmware update.
A video can be found at: http://www.youtube.com/watch?v=P4Qn7Zik-PQ&feature=c4-overview&list=UUyINgLcmcllEu1lyc7IiDFw