These simple instructions can be used for the following actions.
-
A - Replacing the two power compact lamps or starters.
-
B - Replacing the moonlight LED'S in the hood.
-
C - Replacing the hood cooling fans.
The Electrics of the Nano-Cube are relatively simple to allow any components that become loose in transit or fail to be easily repaired. If you are unsure about your ability to safely carry out any of this work then we suggest that you consult a suitably qualified person for assistance.
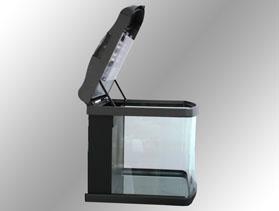
Before carrying out any of this work please unplug all electrics and remove the hood from the aquarium as described in the instruction booklet.
Cover glass removal
Sit the hood upside down on a soft surface and remove the poly carbonate splash guard by removing the 13 screws using a philips screwdriver. The screws are marked in red.
Remove the cover with its gasket and carefully put it to one side with the screws. You can now get easy access to the two bulbs and to the starter units for the magnetic ballasts.
Bulb replacement and adjustment.
When replacing or checking the bulbs please ensure that they are properly fitted and that they make a good contact with the two metal prongs inside the bulb holder.

If the light flickers off and on during movement of the lid you should ensure that the bulbs have not come loose during transit and push them firmly home.

Check that the two clips marked on the photo above are holding the bulb tightly and adjust if necessary.
The bulb should be seated firmly but not to tight as it is held in further by a larger clip half way up its length.
Starter (choke) replacement
There are 2 chokes or starters, one for each light tube. If this requires replacement then they are easily removed from the holders and twist in and out.
Reflector removal
There are 7 screws that hold on the reflector. These are shown in red on the picture above. There are also other screws indicated in green which should not be removed.
The reflector can now be carefully leaned back for access to the wiring and other components.

Fan replacement
In the event of having to change one of the fans you must first snip the cable ties shown arrowed to release the wires.
The fan (2) is held in with 4 screws and is connected to the power via a white plug onto the small red circuit board (3). The plug (marked 2 below) is simply pulled upwards to remove the connection from the board. There may be a small blob of white glue which is there to hold the wires in position. This is easily removed if it hinders the removal of the plug.
Replace the fan and plug back into the board. Carefully test the fan by switching on the power to the lid. Do not touch inside the lid during this stage and switch off the mains before any further assembly.
Moonlight LED Replacement
In the event of having to replace one of the LED units (4 on top photo).
The LED shown is held to the reflector with 2 screws and is connected to the power via a white plug onto the small red circuit board (3). The plug (marked 3 above) is simply pulled upwards to remove the connection from the board. There may be a small blob of white glue which is there to hold the wires in position. This is easily removed if it hinders the removal of the plug. The other end of the wire is connected to the switch (1) and is easily removed.
Replace the pair of LED's and plug back into the board. Carefully test the LED by switching on the power to the lid. Do not touch inside the lid during this stage and switch off the mains before any further assembly.
There is a red light on the circuit board to show that the unit is working.
Assembly
Is the reverse of the above.
Replace the wiring carefully when fitting the reflector.
Plug back in and test the unit before fitting back to the aquarium.