1. Introduction

1.1 Please Read Before Use
We have provided the following documents for the DDP4 and DDP4 PRO dosing pump users:
1. DDP4 Dosing Pump User Manual
2. DDP4 PRO Dosing Pump User Manual

Users are advised to thoroughly read the user manual before first use of the dosing pump.

1.2 Downloading of the D-D H20cean App

1. Scan QR code to download.

iOS

Android

Alternatively, please go to the Apple APP Store or Google Play and search for "D-D H2Ocean Dosing Pump"

Note: This app supports 105 9.1 and above Apple devices, Android 4.4 and above Android devices. 

1.3 View User Manual 
After installing the APP, please open the APP and click on the '?' icon at the top left corner, then select your model (DDPP4 or DDP4 PRO) and then click on user manual.

2. Product Information

2.1 Introduction 
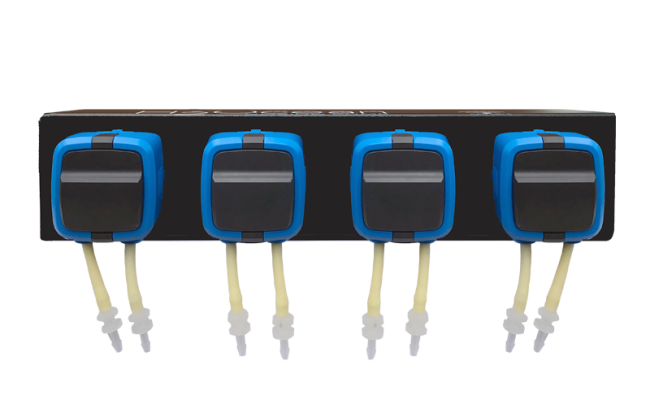
The D-D DDP4 is a 4-channel intelligent dosing pump with WIFI control. It is mainly used to quantitatively add aquarium additives, such as Ca, Mg and KH supplements. It easily maintains water quality and greatly reduces the user workload. The D-D DDP4 PRO uses Kamoer patented geared pump heads to ensure that the pump head does not slip and rust, and each channel is distinguished by a different color housing. In addition, highly reliable threaded joints are used to ensure no leaks occur at connections to the pump head. 

The pump heads use Pharmed long life pump tubing. The D-D H2Ocean APP supports control by both IOS
and Android devices.

2.2 Product Features

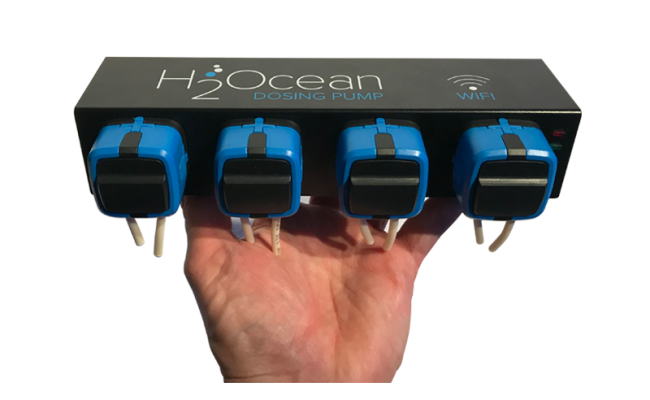
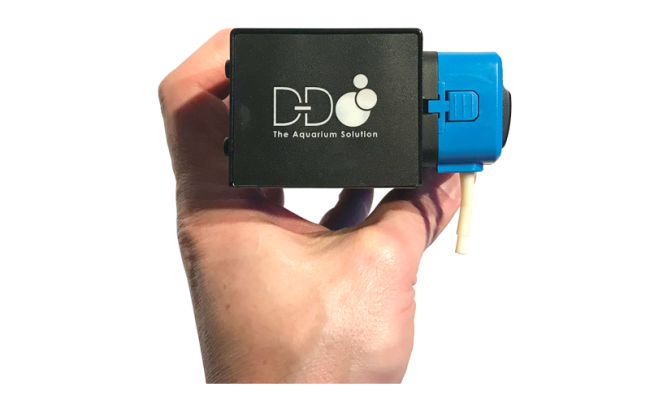
  • Compact and powerful
  • Kamoer's patented gear-driven pump head ensures that the pump head will not slip or rust (Pro model only).
  • Highly reliable threaded joints ensure no leakage problems (Pro Model only)
  • The dosing channel uses 4 different color pump heads (Pro Model only)
  • Pharmed BPT pump tube offers long life, heat resistance, acid/alkali resistance and ozone/UV radiation resistance
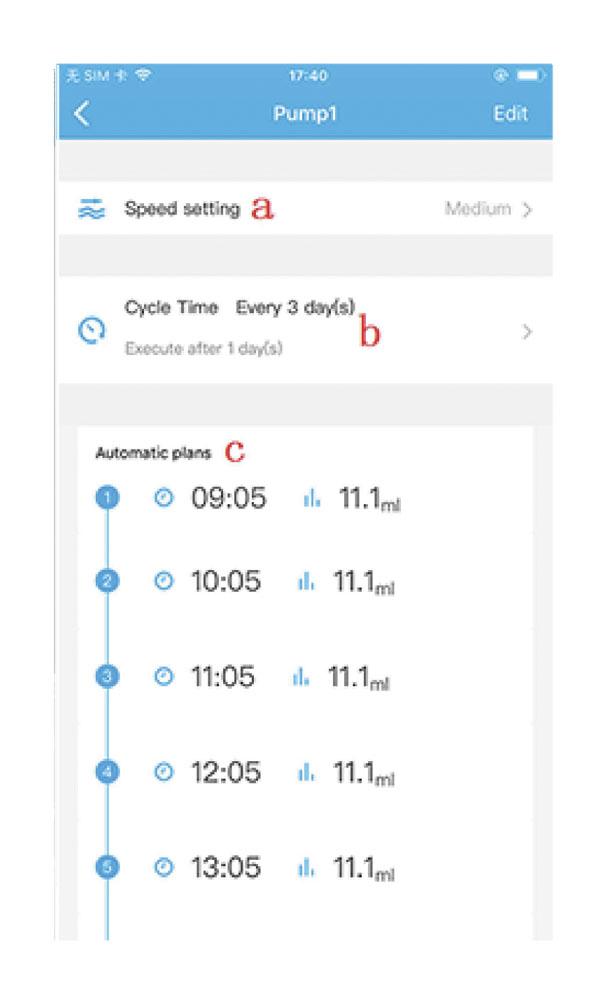
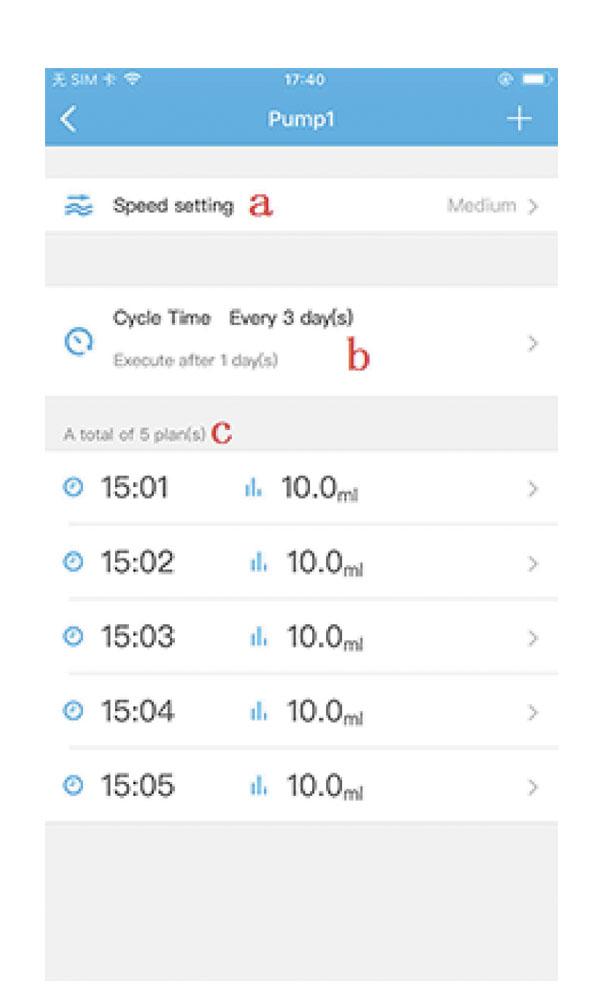
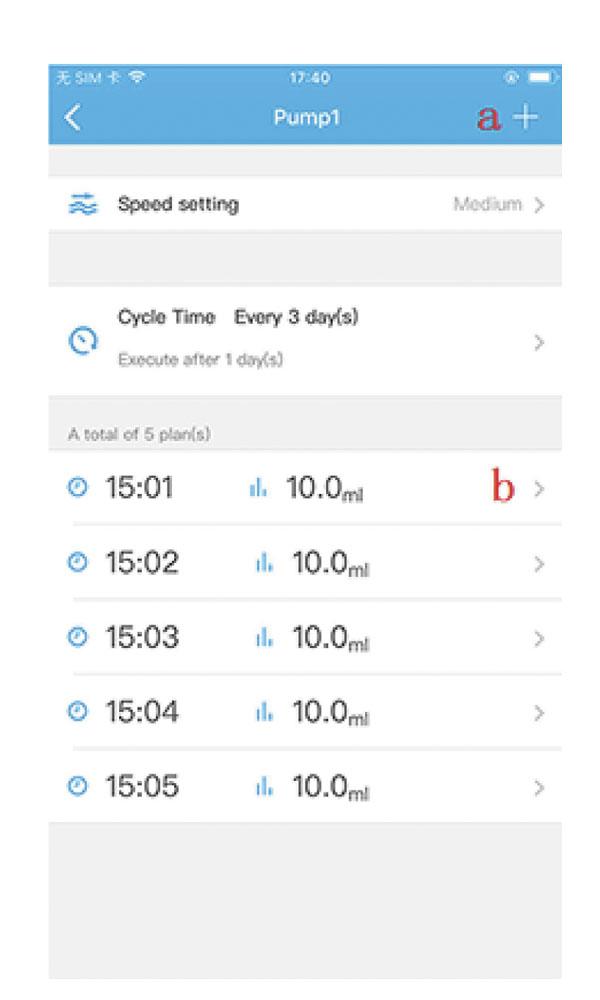
  • Up to 24 dosing cycles per day per channel, 1-99 day cycle dosing per channel or specified weekly dosing per channel
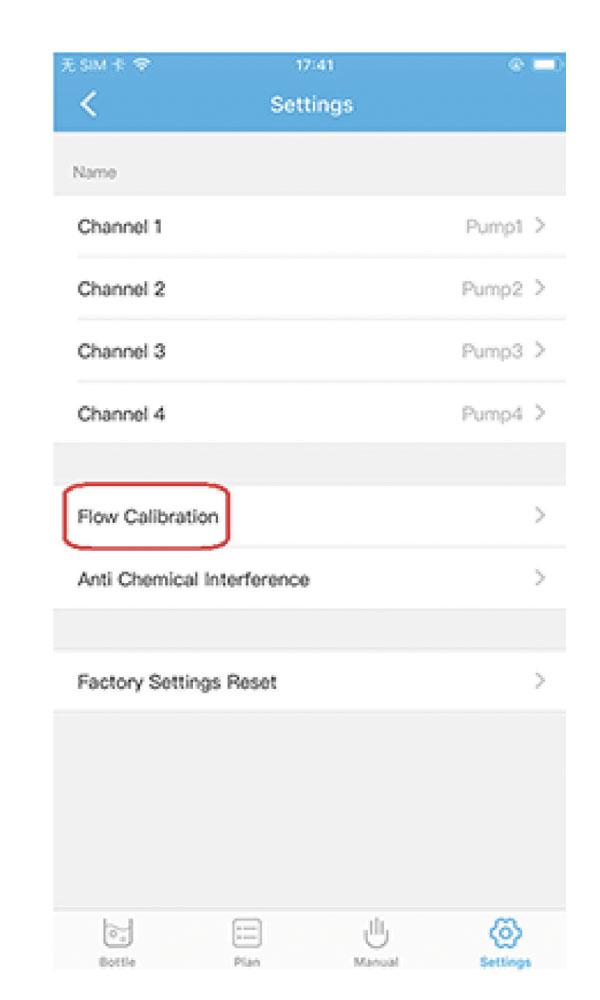
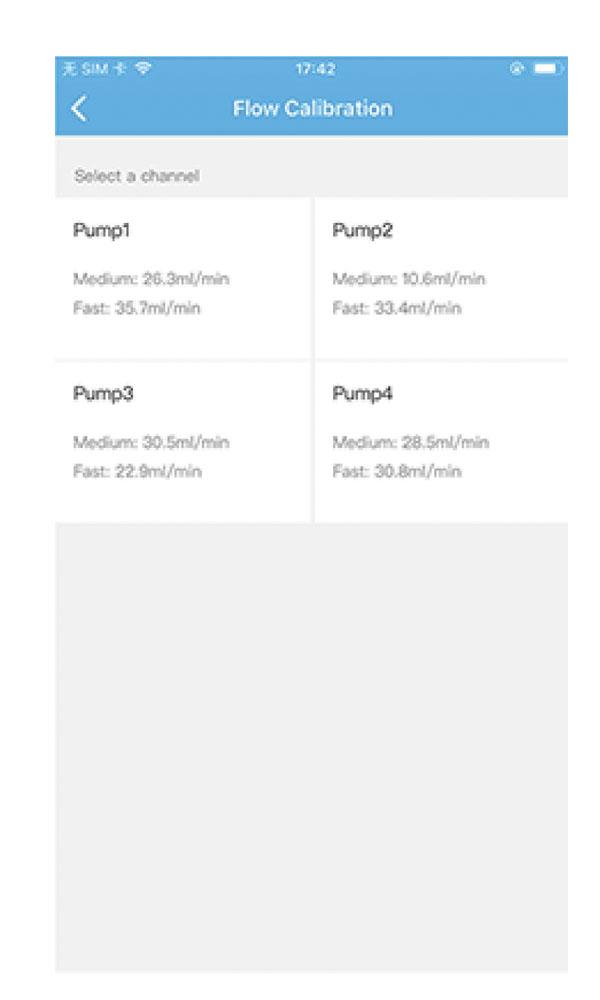
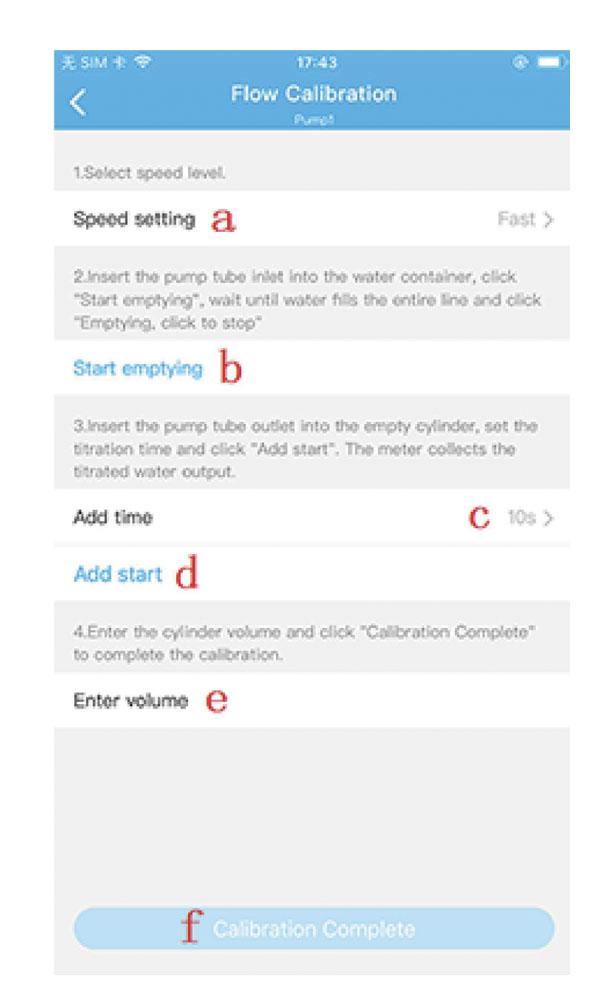
  • Each channel can be individually calibrated
  • DDP4 has a real-time clock, and will automatically run according to the APP setting parameters. In the case of power loss, the dosing pump setting parameters are retained
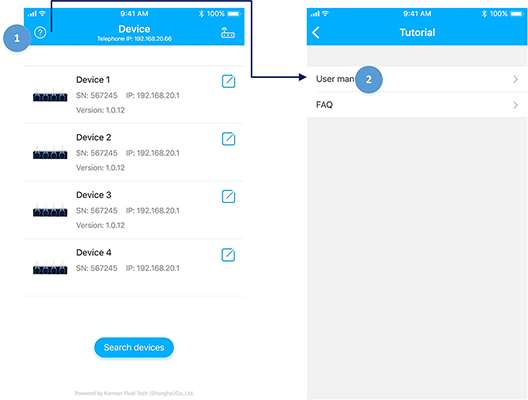
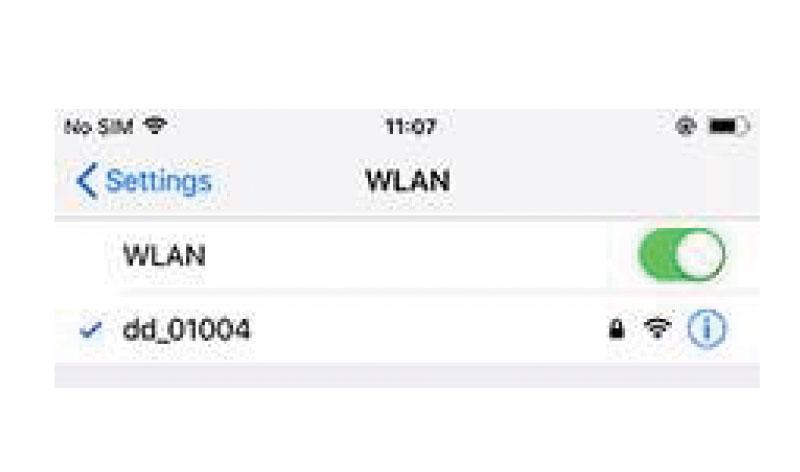
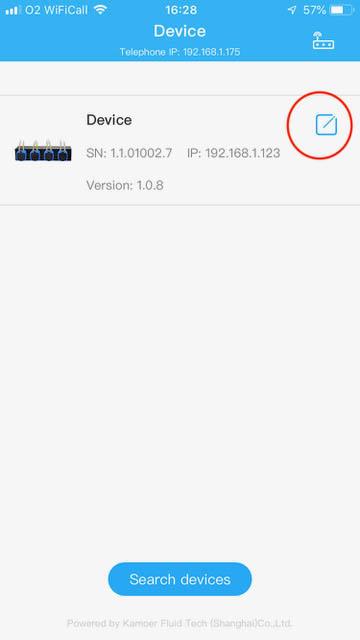
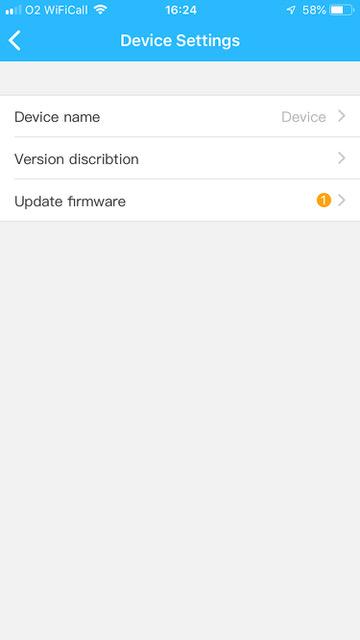
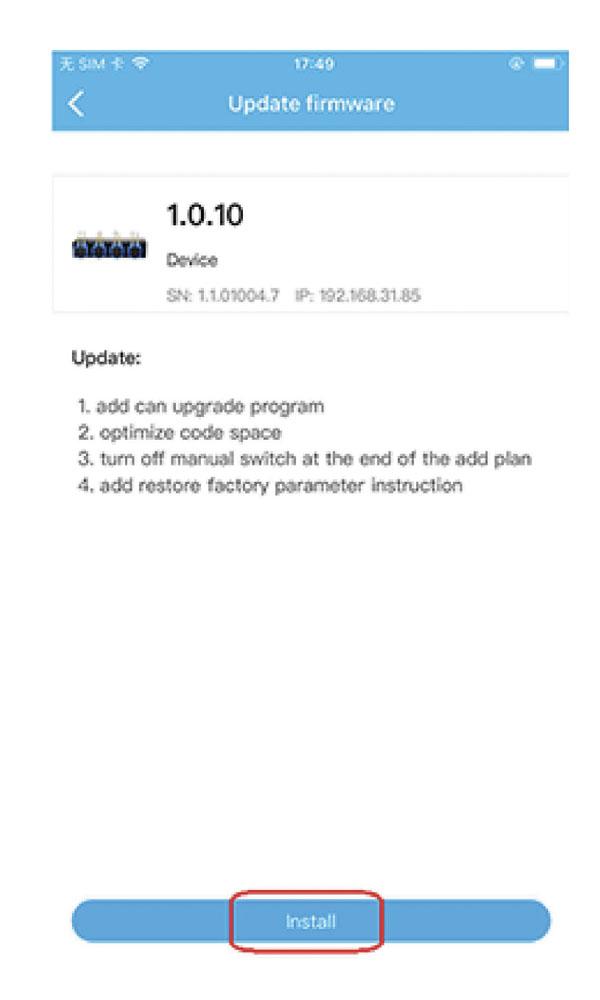
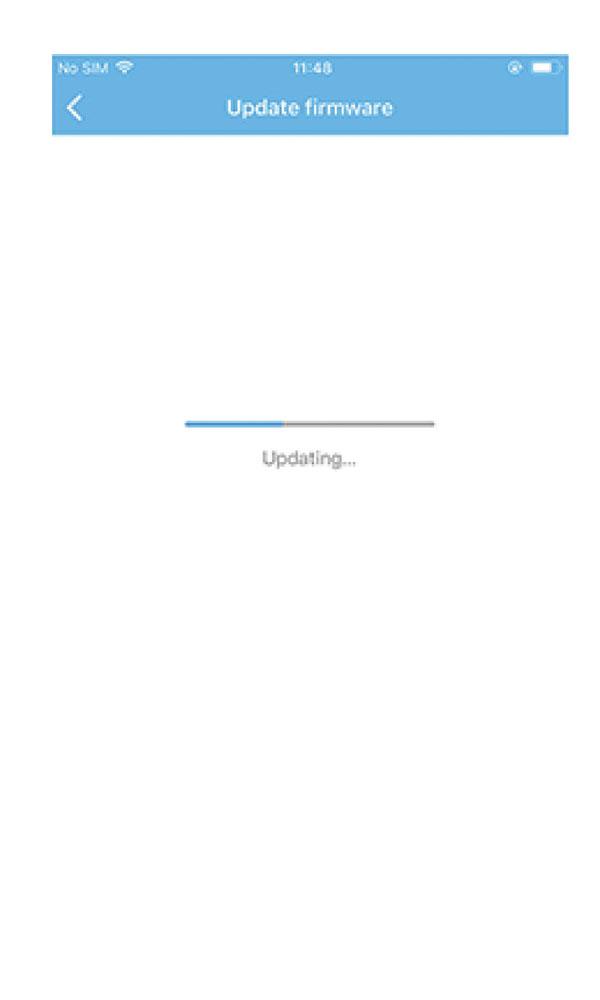
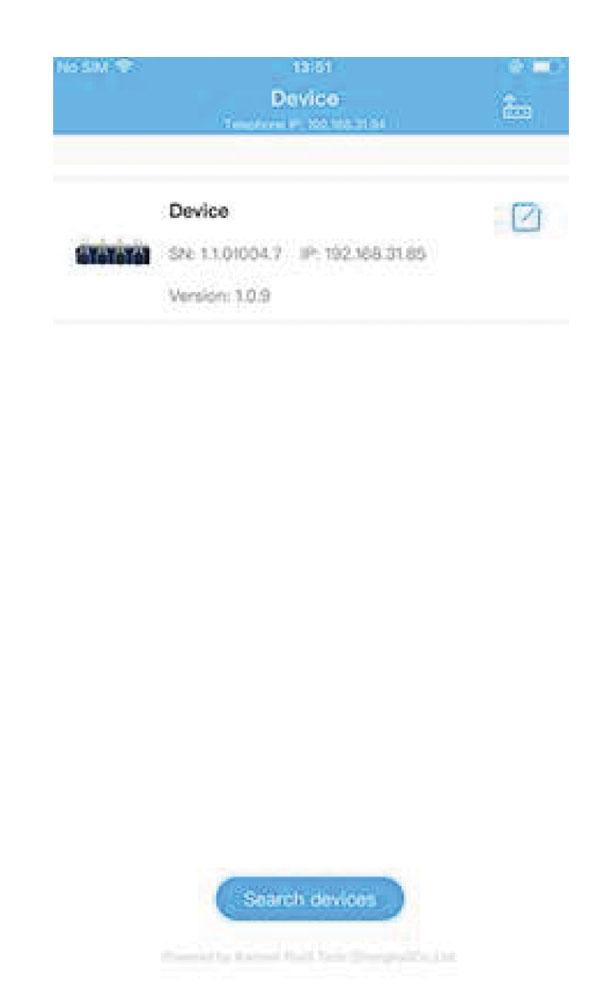
  • The DDP4 APP Supports iOS and Android to control the dosing pump through WIFI. Additionally the DDP4 firmware can be updated via the APP

2.3 Applications
Aquarium Supplement Addition
The DDP4 dosing pump can be utilised to maintain the key parameters of Alkalinity, Calcium and Magnesium and also to control the addition of other elements or coral foods.

Plant Supplement Addition
The DDP4 dosing pump can also be used to maintain liquid nutrient addition in hydroponic applications

2.4 Unpacking

  • Please check for delivery damage before unpacking.
  • Once opened, please inspect the product for any visible damage and check all parts are included.

If any defects are found when unpacking, please contact your retailer immediately.
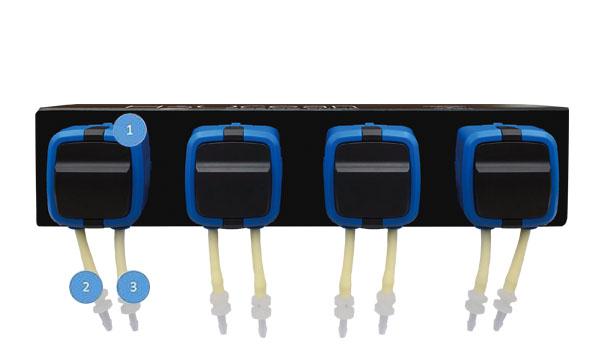
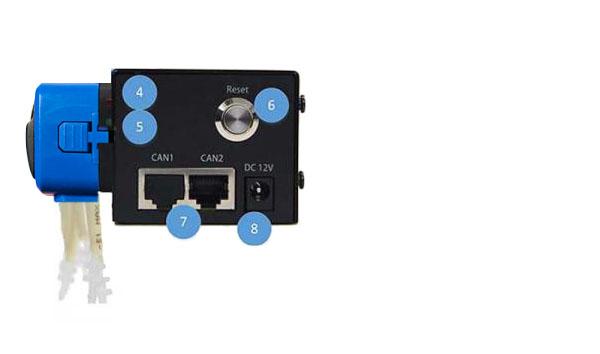
2.5 Product Layout 

1.Pump head (Counterclockwise rotation) 
2.Outlet 
3. Inlet

4. WIFI status indicator (Red)
5. Power indicator (Green)
6. Reset button (Reset)
7. CAN communication interface (for Future Development).
8. Power input (DC 12V)

2.6 Status Indicators
WIFI status Indicator (Red)

STATUS DESCRIPTION
On The dosing pump is connected to the router, and the app controls the dosing pump via router. 
Off The dosing pump is in direct connect mode - the app controls the dosing pump by directly connecting to the dosing pump via WIFI. 
Fast flashing (on 0,1s, off 0.1s)   The dosing pump is in auto connect mode - in this mode the app can
configure the dosing pump to access the router. 
Slow flashing(on 0.5s, off 0.5s)  The dosing pump attempted to connect to the router, but failed.

Power Indicator (Green)

STATUS DESCRIPTION
On The dosing pump is powered on
Off The dosing pump is not powered on or power failure. 

3. Installation

  • The dosing pump is a self-priming pump. When there is big difference between the inlet and the outlet height, siphoning may occur. In order to avoid siphoning, the dosing pump should be placed in a  position to ensure that the height difference between the inlet and the outlet is within 0.5 m.
  • The inlet tube should be as short as possible, and the outlet tube should not be submerged.
  • Please carefully check that the inlet and outlet tube connections are correct on the pump head.


D-D H2Ocean APP

The APP only supports 2.4Ghz connection - 5GHz connection is not possible.

4.1 Connection Mode 
There are two modes to connect to the dosing pump via the app - direct mode and router mode. We recommend using router mode. 

MODE DESCRIPTION ADVANTAGES DISADVANTAGES
Direct mode (AP) This is the Factory default mode - the dosing pump WIFI is visible in the mobile device WIFI list (the WIFI name is in the format dd_XXXXX, where XXXXX is the 5-digit serial number. The connection password is (a12345678). Simple connection via mobile device direct to dosing pump. Can't use WIFI to access internet at the same time.
Router mode (STA) In this mode the dosing pump WIFI IS NOT visible in the device WIFI list - with the mobile device connected to the WIFI that it has been 'paired' with, simply opening the APP will allow connection to the dosing pump. After the configuration is successful, the mobile device is connected to the WIFI that it has been 'paired' with - simply opening the APP will allow connection to the dosing pump. Setup is not as simple as direct mode.

4.2 Reset Dosing Pump WIFI

This function is used to restore the dosing pump WIFI to the factory default mode (direct connect mode).

To reset Dosing Pump WIFI: Press and HOLD the Reset button on the right panel  until the red light flashes twice and the buzzer sounds twice. Then release the Reset button.

4.3 Connect Dosing Pump via Direct Mode 
Power on the dosing pump, wait until the green power indicator light is on and the red WIFI status indicator is off. Then search for the dosing pump WIFI in your mobile phone WIFI list (dd_, followed by the 5-digit serial number) and connect to this WIFI - enter the connection password (a12345678).

4.4 Connect Dosing Pump via Router Mode 
Step 1: Power on the dosing pump, wait until the green power indicator light is on and the red WIFI status indicator is off. 
Step 2: Use mobile device to connect to the WIFI of wireless router. Open the D-D H2Ocean APP and click on the router icon in the upper right corner of the device list page - (this then enters the access router page). 


Step 3: Quickly press the Reset button on the right side panel of the dosing pump once -  the red light will flash quickly - then click on the "Next" button in the router access page - (this will enter router login page)
Step 4: Enter the password for connecting to the wireless router (do not change the router name) then click on the connect button. The dosing pump will now try to connect to the router - (this may take up to 1 minute). If the dosing pump is successfully connected to the router, the red light on the dosing pump will be on (not flashing)  and the connection success dialog box pops up on the APP. Click the OK button in the dialog box to return to the device list page.


Step 5: Click the "search devices" button on the device list page, you should see the dosing pump that has just successfully connected the router on the device list (if the device does not appear, try searching devices again and if it still does not appear, close the APP and restart the APP and search for the device again).

In the device list you can also see the serial number of the dosing pump/the IP address of the dosing pump on the router/software and firmware version. Click on the dosing pump and enter the control interface to view status or set parameters.

NOTES:
A.
The router mode only needs to be configured once. After the configuration is successful, as long as the mobile phone and the dosing pump are connected to the same router, the dosing pump can be found in the device list page.
B.lf the configuration fails, please reset the dosing pump WIFI and start again from the first step.

4.5 Control Interface Overview 
Open the App and click on the dosing pump in the device list to enter the control interface for that dosing pump. The interface has four modules Bottle/Plan/Manual/Settings (visbile across the bottom of the App).

4.6 Bottle Status Page
On this page, you can set the total amount of solution in the dosing container and view the approximate remaining amount. When the dosing container is approaching empty (estimated less than 4 days), the "days left" prompt will change colour from blue to yellow.

The total volume of liquid in the dosing container can be set by user. The remaining volume is automatically reduced according to the planned dosing and manual dosing.

Note: The daily addition amount displayed on the interface shows only the scheduled addition amount per day. If a manual dose is added, the total remaining volume is also reduced accordingly. 

4.7 Plan Dosing Page 
Plan dosing allows the user to schedule when the dosing pump will dose. Plan dosing has two modes - automatic and custom.

MODE DESCRIPTION FEATURES
Automatic User sets dosing start and stop time (dosing period), the total amount to be dosed, the number of doses per day. The dosing pump will automatically calculate the amount to dose -  evenly spreading the total amount over the number of dosing periods.  This is the simplest and recommended mode. The user simply enters total daily dose and the dosing pump will automatically calculate how much to dose each dosing period.
Custom User can add plans as needed. The start time and the added amount of each plan can be set independently. Up to 24 plans per channel per day can be set.  Switching between modes can be performed by selecting the switch mode icon in the upper right corner of the plan dosing page.

Switching between modes can be performed by selecting the switch mode icon in the upper right corner of the plan dosing page.

1. Channel list page The channel list page lists the basic information about each channel and includes:
a. Channel Name - The name of the channel can be set in the Settings page
b. Daily addition amount: The total amount to be dosed over the dosing day (0:00 to 23:59).
c. Cycle period: Each channel can be set to dose by number of days or Days of the week.
d. Speed: View the speed level set for the channel (medium or fast).
e. Enable Plan: This enables/disables the plan for the dosing pump channel. 

2. Automatic plan details page: Select the  channel in the channel list to enter automatic plan details page for that channel. This page includes:

a. Speed setting: Set the speed level of the pump head (Medium or fast). Medium is recommended for smaller volumes or where greater dosing precision is required.
b. Cycle period: The dosing frequency can be set by number of days (1 - 99) or specific days of the week.
c. Plan list: Shows the time and amount to be dosed per day (maximum of 24 periods per day).

3. Automatic plan setting page On the automatic plan details page select the 'Edit' button in the top right
corner to edit the automatic plan settings. The following parameters can be set: 

a. Start time: The start time for the daily schedule. This can only be the hour (no minutes can be set as minutes are reserved for anti chemical interference delay setting) e.g. 00:00, 01:00 etc. Start and Stop time cannot span midnight as a "dosing day" is defined as 00:00 to 23:59.
b. Stop time: The stop time for the daily schedule. This can only be the hour (no minutes can be set as minutes are reserved for anti chemical interference delay setting) e.g. 22:59, 23:59 etc
c. Anti-chemical interference time: Time offset from the top of the hour (XX:00). This time is used to prevent multiple pumps from adding elements at the same time. This time can be set on the setting page.
d. Add times: The number of doses per dosing period set by start and stop time (maximum is 1 per hour).
e. Total add: The total dosing amount during the time period between start time and end time.
f. Single add: Calculated by the dosing pump from the number of doses and the total dosing amount.
s. Save: Saves settings for channel plan. Selecting the '<' icon at the top left of page will return to channel list without saving the settings.

4.9 Plan Dosing-Custom Mode 
1. The channel list page lists the basic information about each channel and includes:
a. Channel Name: The name of the channel can be set in the Settings page
b. Daily addition amount: The total amount to be dosed over the dosing day (0:00 to 23:59).
c. Cycle period: Each channel can be set to dose by number of days or Days of the week.
d. Speed: View the speed level set for the channel (medium or fast).
e. Enable Plan: This enables/disables the plan for the dosing pump channel. 

2. Custom plan details page: Select the  channel in the channel list to enter automatic plan details page for that channel. This page includes: 
a. Speed setting: Set the speed level of the pump head (Medium or fast). Medium is recommended for smaller volumes or where greater dosing precision is required.
b. Cycle period: The dosing frequency can be set by number of days (1 - 99) or specific days of the week.
c. Plan list: Shows the time and amount to be dosed per day (maximum of 24 periods per day).

3. Add, edit or delete custom plan
a. Add: Click Add Plan icon "+" icon top right of page). Enter the start time and the required dose and select the 'Save' button to complete the plan addition.
b. Edit: Select one of the plans in the plan list to enter the edit plan interface - modify the start time and/or the dosing addition amount. Then  select the 'Save' button.
c. Delete: Swipe the plan to be deleted in the plan list to the left, the "Delete" button appears. Select "Delete" to delete.

4.10 Manual Dosing Page 
Manual dosing can be done at any time to meet the user's temporary dosing requirements or to prime the dosing tube. 
a. Channel Name: The name of the channel can be set in the Settings page
b. Dosing amount: Set the amount to be manually dosed (a one off addition). The pump will stop manually dosing after this single addition.
c. Speed: Set the speed level of the pump head (Medium or fast). Medium is recommended for smaller volumes or where greater dosing precision is required.
d. Start/Stop button: Start the manual dose - the dosing pump will stop manually doing after it has dosed the entered amount. The manual dose can be interrupted by selecting stop.

4.11 Settings Page 
a. Channel Name: The name of the channel can be set to help user identify the purpose of the channel e.g. kH, Ca, Mg.
b. Flow rate calibration: The flow rate of each pump head is calibrated here. The purpose of flow calibration is to improve the accuracy of the added elements;
c. Anti-chemical interference: Set the anti-chemical interference delay of the dosing pump to prevent 
chemical interference caused by the simultaneous addition of elements. Only applies to automatic mode -  does not function for the custom mode. The total time for all 4 channel must be less than 55 minutes.
d. Fatory Settings Reset: Factory Settings Reset: All settings of the dosing pump are restored to the factory default settings.

4.12 Flow Calibration 
The purpose of calibration is to improve the accuracy of dosing. Calibration should be performed before first use and again if you believe the accuracy has changed (due to dosing tube ageing/ pump head wear).

On the setting page, select 'Flow Calibration' to enter the calibration pump head selection page, select the pump head to be calibrated, and
enter the flow calibration page.

Calibration requires the use of a measuring cylinder - the dosing pump is supplied with a 10ml measuring cylinder. 

a. Speed setting: Set the speed level of the pump head (Medium or fast). Medium is recommended for smaller volumes or where greater dosing precision is required.
b. Start emptying: The purpose of "emptying" is to purge air out of the dosing tube, so that the
accuracy will not be affected after the calibration. After selecting "Start emptying", when the dosing line is clear of air, 'stop Emptying' can be selected. 
c. Add Time: This sets the running time of the dosing pump. Before proceeding to
the next step, make sure that the pump inlet is immersed in liquid and the pump outlet is placed in the measuring cylinder.
d. Add start: Click "Add start" button, the pump will run the time set in the previous step and then stop;
e. Enter volume: Input the volume of the liquid in the measuring cylinder in ml.
f. Calibration complete: Click 'Calibration Complete' button to complete the flow calibration and save the results.

4.13 Factory Settings Reset
By selecting this all settings of the dosing pump are restored to the factory default settings. To perform rest, select reset when prompted.


4.14 Firmware Upgrade 
Editing Device Name/Checking for Firmware update:
When viewing dosing Pump in device list, select the edit icon to the right of the device to edit pump name and check for firmware update.

In the device setting page, the device name can be edited. In addition, if a firmware update is available, it will be indicated by an orange icon to the right of firmware update.

When the pump firmware is updated, you can upgrade the firmware via the app. 
Note: Before upgrading make sure that the app is connected to the dosing pump through the router. If the App does not control the dosing pump through the router, please connect the dosing pump to the router first, and then perform the following upgrade operation. 
Step 1: Open the App, search for the device, click the icon to the right of the device to enter the editing interface.
Step 2: Click "Update Firmware" to enter the upgrade interface. The upgrade interface contains the latest version number and version description.
Step 3: Click the Install button to install the update - this may take several minutes.
Step 4: After the upgrade is complete the app should display a pop up with Success and the dosing pump will give a single beep and should re start with both the red and green LED on (not flashing). After the upgrade is complete, return to the device list interface. Check the device now shows the updated firmware - if it does not click on search devices again to update - if still not updated, close APP and re open APP.

Note: Keep power on during the upgrade process and do not perform other operations during the
upgrade process.

5. Appendix

5.1 Technical Parameters

• Dimensions (LWH) 231x89x49 mm
• Weight 950g (without power adapter)
• Power adapter
- Input: See the power adapter label for details.
- Output: DC12V 2A
• Dosing parameters
- Dosing channel: 4 pump heads
- Number of dosing: 24 times/ day - 1 time/ 99 days
- Dosing volume accuracy: <±2%
- Manual dose amount: 1 ml - 9999.9 ml
- Tube lifetime: >1000 hours
• lnterface WIFI and CAN communication interface
• Working environment Temperature 0-70° C, humidity 10%-90% (non-condensing)
• Storage environment Temperature -20° C-85° C, humidity 10%-90% (non-condensing)