AI Mark II Controller quick set up guide
What’s in the Box
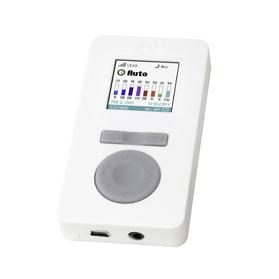
• Controller
• Mini USB (use for firmware updates and connecting power supply)
(Power supply available separately)
Set the Wireless connection
Vega, Hydra and Hydra 52
To connect the Controller with a light unit, make sure the LED on the side of the light (next to power supply plug in) is red.
Press and hold the red button for approximately seven seconds. The light will alternate back and forth from red to green.
To complete the wireless setup for the Vega, Hydra and Hydra 52:
1. From the Home screen, press MENU.
2. Scroll down to the Setup Lights menu option and press SELECT.
3. The controller will then need to be set for Wireless and select the channel that you wish to use from 1-9 and press OK. The Wireless Setup window displays and the device searches for lights. A progress bar indicates the status.
4. A message displays, indicating whether lights are detected. If all lights are found, press OK.
5. If you have multiple modules connected, you need to indicate what order the lights are in above the tank (on the next screen that displays). The lights are counted from the left. The lights will need to be arranged as Left, Left +1,Left +2 , Left +3 etc in order from Left to Right. Continue this process for all discovered lights and press OK.
6. . Return to the Home screen to see the signal strength of your wireless connection.
Wireless Module
To connect a Sol or Nano module with the wireless adapter, press the reset button using a paperclip or other object for approximately seven seconds to change the light from green to red.
Then follow the same steps from 1-6 for connecting Vega/Hydra/Hydra52
(Wireless Module purchased separately)
Change the Wireless Options
This menu is greyed out/unavailable unless you have already established a wireless connection. Once a connection is established you can change the wireless channel in case of interference.
Timer Setup (Easy)
If you need a simple day and night ramp or you are just starting out with the timers, this is the recommended option for setting up timers. The easy setup creates six individual timers in the manual setup screen. The method behind the sunrise/sunset ramp up method is to begin with the least intensity and “ramp up” throughout the day. Then, the colours “ramp down” in the reverse order during sunset to the lowest intensity again.
1. From the Home screen, press MENU.
2. Press SELECT to open the Timer Setup (Easy) menu option.
3. Set the hour/minute/AM/PM for the sunrise and sunset and the hour/minute for ramp time.
4. You will also find the ‘favor’ setting, this allows either a white bias or blue bias sunrise and sunset.
5. You can also set the sweep direction to uniform, left-to-right or right-to-left. You can set the sweep speed to auto, or anywhere from 1-10.
6. Press OK. The Colour Settings window will then display.
7. Confirm or change the maximum and night percentage values for each LED colour. NOTE: The LED colours differ depending on the AI light module you have connected to the controller.
8. Press OK. You return to the main menu.
After you confirm your settings in the Timer Setup (Easy) menu option, scroll down to the Timer Setup (Manual) option if you wish to change any of the individual easy timer settings. You will see the six individual timers you created automatically in the easy setup mode set up.
Timer Setup (Manual)
You can individually set values for each timer using the Timer Setup (Manual) menu option after completing the Timer Setup (Easy) settings if required or you can move directly to the manual setup mode.
If you used the easy setup mode, you will see six individual timers generated from your settings. There are additional timers available, but you will notice that they are greyed out until you select them and set values. You can turn all timers on or off and you can modify them with your specific preferences. You can also add more timers, up to 30 totals.
1. From the Home screen, press MENU.
2. Scroll down to the Timer Setup (Manual) menu option and press SELECT.
3. For active timers, select your desired settings for time, colour, level and ramp time. For inactive timers, use the right or left arrow to select Yes, and then change the settings.
4. Press OK. The main menu displays your real-time light settings.
Weather Effects
Weather effects are disabled by default and it is up to you if you want to enable them. You can set several weather effects to mimic a natural habitat, which benefits your entire lighting system.
1. From the Home screen, press MENU.
2. Scroll down to the Weather Effects menu option and press SELECT.
3. Enable the weather effects, then select your desired settings for chances, # per day, coverage, lightning and limit to.
4. Press OK
Lunar Cycle
By default, the lunar cycle is disabled. Enable the lunar cycle function to decrease the intensity of the lights based on the current cycle of the moon. The lunar cycle approximates the eight phases of the moon throughout a month’s time.
1. For the lunar cycle to work correctly, the date and time need to be correct. You should set your night-time intensity to what you want a full moon to look like.
2. From the Home screen, press MENU.
3. Scroll down to the Lunar Cycle menu option and press SELECT.
4. Select Yes to enable the lunar cycle.
5. Select the start and end times for the lunar cycle.
6. Press OK.
7. Return to the Home screen. When the lunar cycle is active during the start and end time you selected, the moon icon displays on the Home screen.
Test Run
The New Controller is equipped with two light test functions. At any time, you can complete a test run to cycle through your 24-hour settings in two minutes. Use this function to quickly see if your settings function as you expected.
1. From the Home screen, press MENU.
2. Scroll down to the Test Run menu option and press SELECT. The controller runs through the 24-cycle of your timers in 2 minutes.
3. If the controller settings do not function as you expected, change your settings as needed.
4. Press OK.
Test Lights
You can test each individual colour of LED and you can turn single colours on or off. This is helpful if you need to run module diagnostics.
1. From the Home screen, press MENU.
2. Scroll down to the More menu option and press SELECT.
3. Press SELECT to open the Test Lights menu option.
4. Change the colour using the left or right arrow key. Move to the next or previous colour using the up or down arrow key.
5. Press OK.
Screen Saver
You can enable the screen saver and set the length of inactive time before the screen saver displays. You can set it from 1-30 minutes.
1. From the Home screen, press MENU.
2. Scroll down to the More menu option and press SELECT.
3. Scroll down to the Screen Saver menu option and press SELECT.
4. Enable the screen saver.
5. Select the length of inactive time before the controller goes into screen saver mode.
6. Press OK.
Coral Acclimation
By default, the coral acclimation setting is disabled. Enable the coral acclimation setting to introduce new corals to light gradually to prevent burning or bleaching. Set the reduction factor using 10% increments and select start and end dates for the acclimation period.
1. From the Home screen, press MENU.
2. Scroll down to the More menu option and press SELECT.
3. Scroll down to the Coral Acclimation menu option and press SELECT.
4. Set the reduction factor, start date and end date.
5. Press OK.
6. Your maximum settings are reduced by the acclimation factor you selected. The lower intensity continues until midnight on the end date.
Switch Modes
Use this menu option to switch back and forth between Auto and Manual modes. When you switch the controller to manual mode, the menu options change.
To switch from Auto to Manual mode:
1. From the Home screen, press MENU.
2. Scroll down More menu option and press SELECT.
3. Scroll down to the Switch Modes menu option and press SELECT. A pop-up message asks if you want to switch to Manual mode.
4. Press OK.
5. The menu options reconfigure to display only the relevant options for operating the controller manually.
To switch from manual to auto mode:
1. From the Home screen, press MENU.
2. Scroll down to the Switch Modes menu option and press SELECT. A pop-up message asks if you want to switch to auto mode.
3. Press OK.
4. The menu options reconfigure to display only the relevant options for auto configuration. Your original settings for auto mode remain intact.
Set the Clock
The clock must be set to the correct time and date for settings such as the lunar cycle to work properly.
1. From the Home screen, press MENU.
2. Scroll down to the More menu option and press SELECT.
3. Scroll down to the Set Clock menu option and press SELECT.
4. Set the correct hour, minutes, seconds and select AM or PM.
5. Set the correct month, day and year.
6. Set the Auto DST menu option to Yes if you want the controller to automatically adjust for daylight savings time or No if you do not want that setting.
7. Press OK.
Key Sensitivity
The key sensitivity is automatically set to 03 on the New Controller. To make the keys less sensitive, requiring more pressure/a harder press when you push a key, set the key sensitivity to a higher number. To adjust the keys so they are more sensitive, requiring less pressure when you press a key, select a lower number.
1. From the Home screen, press MENU.
2. Scroll down to the More menu option and press SELECT.
3. Scroll down to the Key Sensitivity menu option and press SELECT.
4. Select a key sensitivity setting from 1-10.
5. Press OK
Firmware Update
From time to time Firmware updates for the controller will be made available. You can visit the support website to see when the latest firmware updates are available at:
http://support.aquaillumination.com
When your controller is connected to a light module after a controller firmware update, you are prompted whenever a light module firmware update is available and you will need to update your light module firmware.
Note: For best performance, make sure the controller is located near your lights to prevent signal interruption during firmware updates.
Factory Reset
1. From the Home screen, press MENU.
2. Scroll down to the More menu option and press SELECT.
3. Scroll down to the Factory Reset menu option and press SELECT. A warning message displays to remind you that all of your custom settings for timers and effects will be erased if you proceed.
4. Press OK.
5. The controller restarts. The Setup Lights menu option displays so that you can customize your settings.
Videos
For videos on use and setup please visit the YouTube™ page at: