SETTING UP YOUR AQUAILLUMINATION LED LIGHT USING LOCAL/DIRECT SETTINGS WITHOUT A ROUTER
STEP 1 - Before setting up your AI Hyperdrive light you need to download the FREE "myAI" App onto your phone or device.


STEP 2 - Search on your device under for wifi networks for the access point or wifi network which matches the number written on the light.


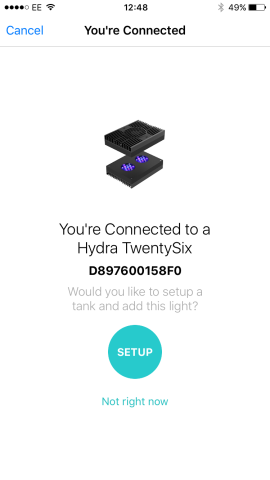
STEP 3 - Open up the myAI app and the screen below should appear automatically.


STEP 4 - Click setup
STEP 5 - Choose a name for your aquarium or group of lights.


STEP 6 - A list of available lights will appear which you can control. On the image below you can see the new parent light plus another two lights that are available for connection listed below it. The parent light will feed any programming changes to it's child or children so that you only have one acces point per group of lights. It is of course possible to make every light a parent so that you can adjust them individually in different sectors of the tank.
STEP 7 - Quickly tap the first light and it will flash to show that it is the correct unit that you are going to set as a parent.
STEP 8 - Click "next"


STEP 9 - You will see a list of available networks that you can connect the light to however we want to connect locally so we want to click "Skip"


STEP 10 - Click "Lets Go"


STEP 11 - Next select the light or group of lights that you want to control. In this case "Test Set Up". You will note that it is marked as a local group or device.


STEP 12 - Click the device group that you want to control and the screen below will open up, in this example that will be ' Test Set up'. At this point you may also be advised that there is a software version available which you can upload straight to the light at this stage. Once the firmware has installed and the light has rebooted you will need to go back into 'Settings ' then 'Wi-Fi' on your Phone or Tablet and connect to the Parent light before you re-open the App as the light will lose its Wi-Fi connection once it reboots after the firmware update.


STEP 13 - Once you are reconnected to the lights Wi-Fi open the App and click the device group again, you will now land on the main Dashboard of the group and on this page you can press "All On" to overide any programming and put the light on full, "All Off" to switch the light off again or "Schedule" to follow any preset schedule.
You can now Click Control on the bottom row of icons to set up the lights 'Easy setting' . The Dashboard must be set into 'Schedule ' mode after setting up the Easy set up to allow the Easy set up Schedule to run and not set to All off or All on.
More on setting up an Easy schedule can be found in Step 15.


STEP 14 - adding additional child lights.
Plug in any additional lights and click devices on the bottom row of icons.
you should see any additional lights in the list like below.
If you do not see the light that you are looking for then pull down on the screen to refresh the list.


The light we wish to add is the one ending in 1FCA and so we click the wifi fan to select it. It will tick the light or lights that you want to join to the parent.


Click "connect"
You will see the screen below as it connects to the child light.


Press "OK"
At this stage you may need to check that the phone or device has not jumped back onto your home wifi network and if it has then connect back to the parent light.
You will then go back to the main screen below

Click on your local group of devices, in this case "Test Set up"
Now, when the page opens you will see that you are now connected to 2 lights (or more) as below.


If you click the devices button you will now see the parent and the child indicated separately.
Repeat this with other lights creating as many parents and children as you need.


You are now connected locally to your lights.
Each time you want to make any changes to the programme, simply connect to the parent light by selecting it's wifi network and open up the myAI app.
STEP 15 Controlling the lights
Having clicked control, the page below will open up which will allow you to press either
"Manual"
To manually control the current "live" colour of the light by simply moving the sliders which overides any preset programme in the light.


or
"Auto"


To set a timed programme
This is achieved by picking and controlling a series of set points throughout the day as to how you want the colour to look at that point. The colours change in straight lines between the points so the more points that are added the more the colour changes.
You can make the profiles as simple or as complicated as you like until you achieve the perfect lighting through out the day.
It is also possible to use the easy set up button where you simply set a maximum intensity colour, a sunrise and sunset time and it will work out the rest.