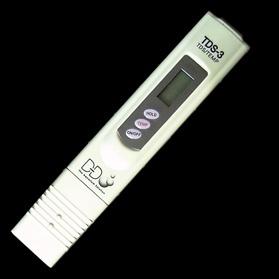
Proper Usage
• Immerse the meter in the water/solution up to the maximum immersion level (2").
• Lightly tap or stir the meter to remove any air bubbles.
- Pockets of air between the electrodes may interfere with the electrical current.
• Wait 10-20 seconds for the reading to stabilize.
- In hot (or ice cold) water, wait 20-30 seconds for the meter to compensate for temperature.
As the water temperature will adjust to room temperature, the reading will change to
accommodate the proper compensation.
• To ensure greater accuracy, turn the meter off and on for each reading.
• Shake any water off the meter after each use.
- This is to remove the droplets of water that may adhere to the surface between the
sensors and the housing around them. These drops may interfere with readings.
• Rinse in de-ionized water or other filtered water after use to ensure proper readings.
• The meter is not waterproof: Do not drop or submerge the unit in water.
• Do not store the unit in high temperature or direct sunlight.
Calibration
• D-D meters are factory-calibrated at 342ppm NaCl and designed to stay consistent.
- However, you may need to recalibrate your meter from time to time, or for certain
applications. TDS meters are most accurate when calibrated as close as possible to
the sample to be tested. For best results, calibrate at 25 oC (77 oF)
• To ensure accuracy and consistency, recalibrate your meter using a commercial standard
solution. This can be done prior to usage and should be done after prolonged usage.
• For drinking water, we recommend calibrating in a range of 90ppm to 700ppm
Step 1: Measure the TDS level of the solution (follow usage instruction above).
Step 2: If the meter does not read within 2% of the solution, adjust the reading by inserting a mini
screwdriver into the trimmer pot (small hole on the rear of the meter). Gently turn the trimmer
clockwise to increase the reading and counterclockwise to decrease the reading.
- Make sure the screwdriver fits evenly into the groove of the screw.
- Note that the trimmer pot is very sensitive! Remove the screwdriver carefully.
- Try to keep the meter vertical.
Step 3: Once the meter reads within 2% of the solution, gently release pressure on the screwdriver
and remove from the trimmer pot.
- If the screwdriver is retracted abruptly, the reading may jump.
Step 4: With the meter in the solution and the reading at the correct level, press the `HOLD' button.
Let the reading hold for approximately 10 seconds to fully stabilize.
Step 5: Remove the meter from the solution. Shake it to remove any water drops that may adhere
to the probes and casing, creating air gaps.
- Water droplets or air gaps may cause the meter to display an incorrect reading.
Step 6: Turn the meter off, wait a moment and turn the meter on again.
Step 7: Insert the meter into the solution and verify the reading. If the reading is accurate,
calibration is complete. If not, repeat the procedure.