Question: 

The cable on my ClariSea motor has come loose whilst unwinding the fleece. Do I need to buy a new motor or can it be repaired?


Answer: 

We do see this issue reported from time to time, especially if people try to unwind the dirty fleece rather than removing the roll in one piece.

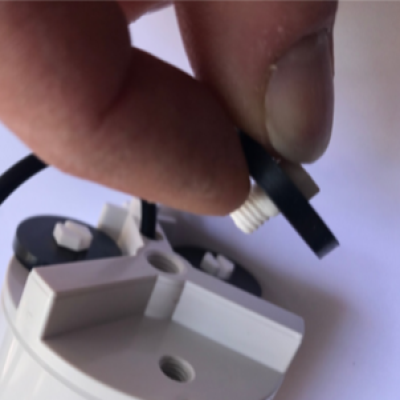
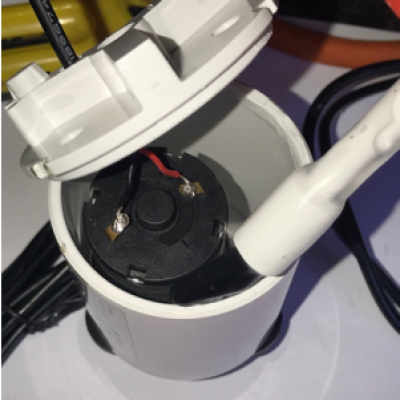
In normal use, there is no tension or load on the motor cable. However if the cable is pulled too hard or the motor and fleece is suspended from the cable, then in some circumstances it can cause the sleeve of the cable to pull loose. This is also the case when people spin and unwind off the dirty fleece.

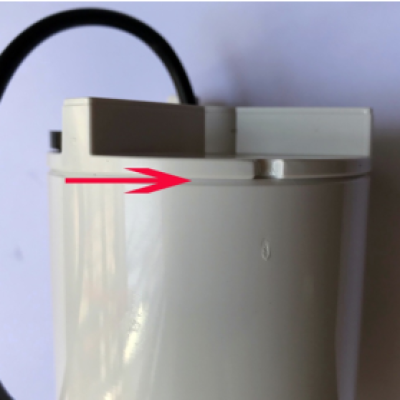
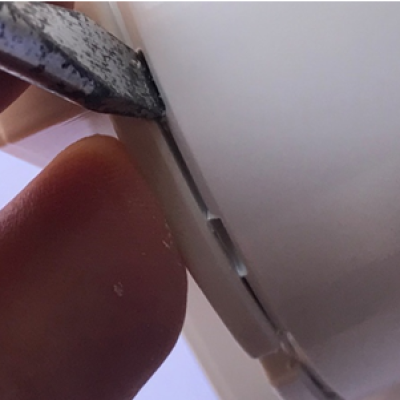
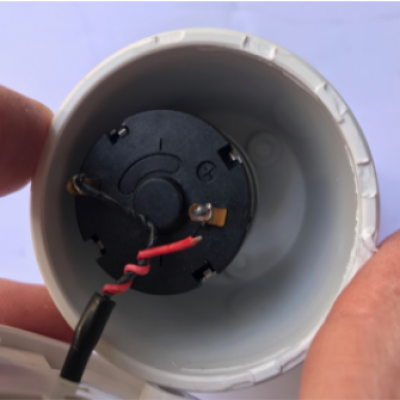
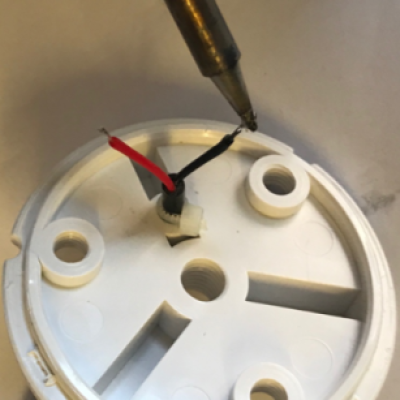
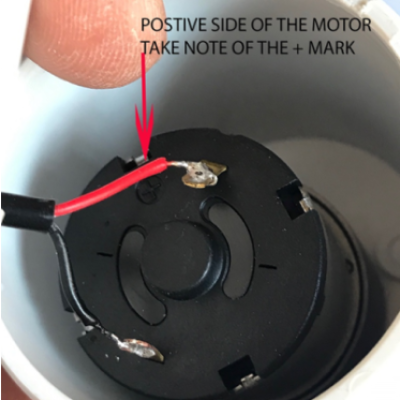
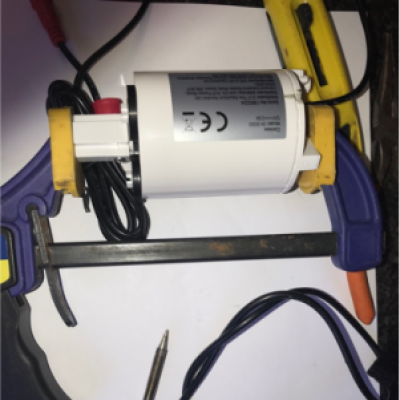
Anyone with some basic ability and a soldering iron can repair the cable by following the instructions below.


Find Stockist Step 1


Remove the drive assembly from the ClariSea. Extract the motor unit by unscrewing the black screw at the front and sliding it out of the housing.

Once this is done remove the guide wheels at the cable end of the motor, so that they do not become damaged during the repair process.


Step 2


Using a permenent marker, mark a line across the motor body and end cap. This will be used when reassembling the unit to make sure the end plate is in the correct position with the motor body.

Locate the glued seam on the end of the motor housing.

Step 3


Using a sharp bladed implement such as a flat head screwdriver, insert the tip in to the joint and tap with a hammer. This should crack the glue joint and you will be able to see the back plate separate from the main body slightly. Take care not to use excessive force.

Step 4


Continue the process around the perimeter of the glued joint, until the end plate is seporated from the main body.

Step 5


With the cap removed the solder joints on the back of the motor will be visable and can be inspected.

In the image shown the red possitive connection has been pulled away due to the cable being continually twisted. This has been done by rotating the motor to remove the dirty fleece instead of sliding the fleece off.

Step 6


De-Solder the wiring from the motor terminals.

The end of the cable should be cut off to remove any twisted or damaged areas.

After this strip back the outer cable sheath by approximately 40mm taking care not to damage the red and black wires.

Strip the red and black wires back by 5mm to expose the bare wire and then using a soldring iron and a small amount of solder 'tin' the exposed ends.

A cable tie can be added to help hold the cable in place. 

Step 7


Solder the wires on to the motor terminals. Take care that the red positive wire is attached to the terminal marked with the '+' symbol.

Step 8


Test fit the top cap on to the motor body and make sure it fits comfortably taking care to line up the mark made on the body and end plate.

At this point you can carefully test the motor electrically.

Step 9


Carefully apply a bead of solvent weld adhesive around the top edge and top inner surface of the motor body. Push the end cap back on to the motor body making sure the mark made on the body and end plate line up. Wipe any excess glue way with a piece of paper roll.

Step 10


Use a clamp, tape, or strong rubber bands to hold the pieces together whilst the glue sets. Most solvent weld glues will set quickly. Is is best to allow the joint to set for 60 minutes before removing the clamp.

Depending on the brand of solvent weld used it may take up to 24 hours for the jont to be fully cured, please refer the the solvent welds manufacturer instructions for this.